How to Grow Asparagus at Home (Even If You’ve Never Gardened Before)

Trista - May 26, 2025
Share

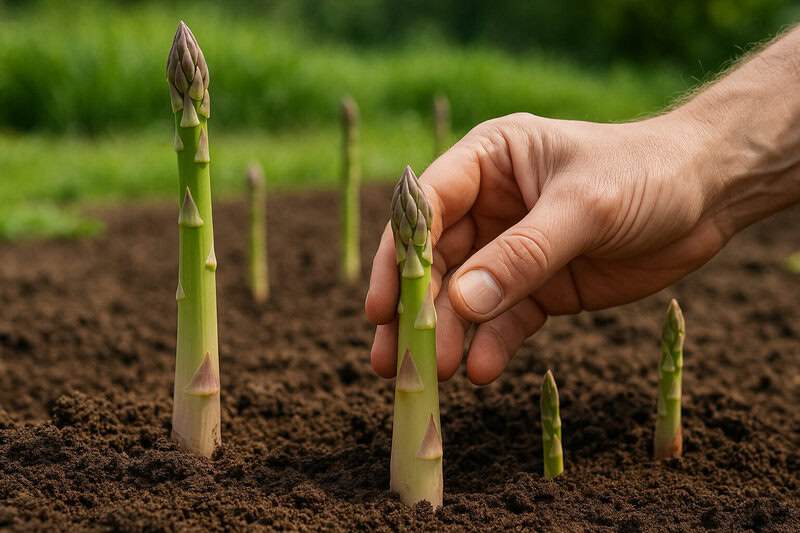
Growing asparagus at home is not only a rewarding endeavor but also simpler than you might think. Asparagus, a perennial vegetable, offers a delicious harvest each spring, year after year. Whether you’re a novice gardener or a seasoned pro, this resilient plant can thrive in your backyard or even in a container garden. Imagine stepping outside to pick fresh stalks from your own garden, adding both taste and nutrition to your meals. Plus, once established, asparagus requires minimal maintenance, making it an ideal choice for those new to gardening. Let’s dive into the steps to bring this delightful vegetable to your home!

1. Understanding Asparagus Basics

1. Understanding Asparagus Basics
Source: Nataliya Vaitkevich on Pexels

Asparagus is a perennial plant, meaning it will return each year with minimal effort on your part. Originating from Europe, this hardy vegetable is celebrated for its tender spears and distinct flavor. Asparagus is not only tasty but also packed with nutrients, including vitamins A, C, E, and K, as well as fiber and folate. Its low calorie content makes it a nutritious addition to any diet. Understanding these basics allows you to appreciate the plant’s resilience and nutritional value. With a lifespan of up to 15 years, asparagus offers a long-term gardening investment.

2. Choosing the Right Variety

Pexels photo 1101248
Source: Pexels

Selecting the right asparagus variety is crucial for successful growth at home. Two popular choices are Jersey Giant and Mary Washington. Jersey Giant is renowned for its high yield and disease resistance, making it an excellent option for beginners. On the other hand, Mary Washington is a classic variety, appreciated for its robust flavor and adaptability to various climates. When deciding, consider your local climate and personal taste preferences. Both varieties offer the chance to cultivate delicious, homegrown asparagus, ensuring you enjoy fresh harvests each spring.

3. Preparing Your Garden Bed

Pexels photo 7658766
Source: Yan Krukau on Pexels

Preparing your garden bed is a vital step in growing healthy asparagus. Start by selecting a location with full sun exposure, as asparagus thrives in sunlight. Once you’ve chosen your spot, focus on soil preparation. Asparagus prefers well-drained soil rich in organic matter, so consider adding compost or well-rotted manure to enhance fertility. Dig trenches about 12 inches deep and 18 inches apart, which allows the roots to spread comfortably. Proper soil preparation ensures your asparagus plants will establish strong root systems, setting the stage for abundant harvests in the years to come.

4. Planting Asparagus Crowns

4. Planting Asparagus Crowns
Source: SHVETS production on Pexels

Planting asparagus crowns is a straightforward process that sets the foundation for your future harvests. Begin by laying the crowns in the prepared trenches, spacing them about 12-18 inches apart to allow for adequate growth. Ensure the roots are spread out evenly, then cover them with 2-3 inches of soil. As the shoots emerge, gradually fill the trench with more soil to support the developing plants. Proper spacing and depth are crucial for healthy plants, as they prevent overcrowding and ensure each crown has enough room to thrive and produce bountiful yields.

5. Watering and Fertilizing Needs

Pexels photo 4750274
Source: Pexels

Consistent watering is essential for establishing healthy asparagus plants. Aim to keep the soil consistently moist, especially during the first two growing seasons. However, be careful not to overwater, as soggy soil can lead to root rot. Once established, asparagus is relatively drought-tolerant but will benefit from regular watering during dry spells. Fertilizing is equally important. Apply a balanced fertilizer in early spring and again after the harvest season to replenish nutrients. Proper care through watering and fertilizing ensures vigorous growth, resulting in a robust, productive asparagus bed.

6. Managing Weeds and Pests

Free photo of photo of a wheelbarrow with green leaves
Source: Pexels

Keeping weeds at bay is crucial for asparagus, as they compete for nutrients and water. Regularly mulch around your plants with straw or bark chips to suppress weed growth and retain moisture. Hand-pull any persistent weeds to prevent them from taking over. Asparagus can also attract pests like asparagus beetles. To manage these, inspect plants regularly and remove any visible beetles by hand. Encourage beneficial insects like ladybugs, which naturally control pest populations. Implementing these practices ensures your asparagus plants remain healthy and productive throughout the growing season.

7. Supporting Growth with Mulching

7. Supporting Growth with Mulching
Source: Engin Akyurt on Pexels

Mulching is a valuable practice for maintaining healthy asparagus plants. By applying a layer of organic mulch, such as straw or wood chips, around your plants, you can effectively retain soil moisture and reduce the need for frequent watering. Additionally, mulch acts as a natural barrier against weeds, minimizing competition for essential nutrients. As the mulch breaks down, it enriches the soil, providing added benefits to your asparagus bed. Implementing a mulching routine not only supports plant growth but also simplifies maintenance, giving you more time to enjoy your thriving garden.

8. Recognizing Harvest Time

8. Recognizing Harvest Time
Source: Photo by Thomas Brenac on Pexels

Knowing when to harvest asparagus is key to enjoying its peak flavor and tenderness. You’ll know it’s time when the spears are about 6-8 inches tall and the tips are tightly closed. To harvest, use a sharp knife or scissors to cut the spears at ground level. Be sure to harvest in the morning when the spears are crisp and cool. During the first couple of years, limit harvesting to allow the plants to establish. Recognizing the right moment ensures you gather asparagus at its best, providing the freshest addition to your meals.

9. Maintaining Your Asparagus Patch

9. Maintaining Your Asparagus Patch
Source: Kaboompics.com on Pexels

Consistent care is essential for a thriving asparagus patch. After the harvest, allow the remaining spears to grow into ferns, as they help replenish the plant’s energy reserves. In late fall, cut back the dried ferns to ground level to prepare for winter. Apply a layer of mulch to protect the crowns from frost. Each spring, before new growth begins, fertilize your patch to boost soil nutrients. Regular maintenance tasks like these ensure your asparagus bed remains productive, offering bountiful harvests for years to come.

10. Common Issues and Solutions

Pexels photo 32207818
Source: Pexels

Growing asparagus can sometimes present challenges, but with a little knowledge, most issues are manageable. Yellowing ferns may indicate nutrient deficiencies, so ensure your soil is well-fertilized. If you notice asparagus rust, a fungal disease marked by orange spots, remove affected ferns and improve air circulation. For pest issues like asparagus beetles, regular inspection and hand removal are effective. Staying vigilant and addressing problems promptly ensures that your asparagus plants remain healthy, minimizing disruptions to your gardening success.

The Joy of Homegrown Asparagus

Pexels photo 2069280
Source: Pexels

Growing asparagus at home is a rewarding journey that offers delicious, nutritious returns year after year. From selecting the right variety to mastering the art of harvesting, each step contributes to a flourishing garden. The initial effort in preparing your garden bed and maintaining your patch ensures a bountiful, long-term harvest. Embrace the satisfaction of nurturing your own food source, and let this experience spark a deeper interest in gardening. Whether you’re a novice or a seasoned gardener, the joy of homegrown asparagus is a testament to the wonders of nature and patience.

Advertisement